User manual · Agents
Conversations and replies
How to reply to a requester, add internal notes, and see whether a message went out.
This page shows you how to reply to a requester, add a note only your team can see, and tell whether a message was actually delivered.
On a ticket's page, the conversation area sits below the status, priority, and assignment controls.
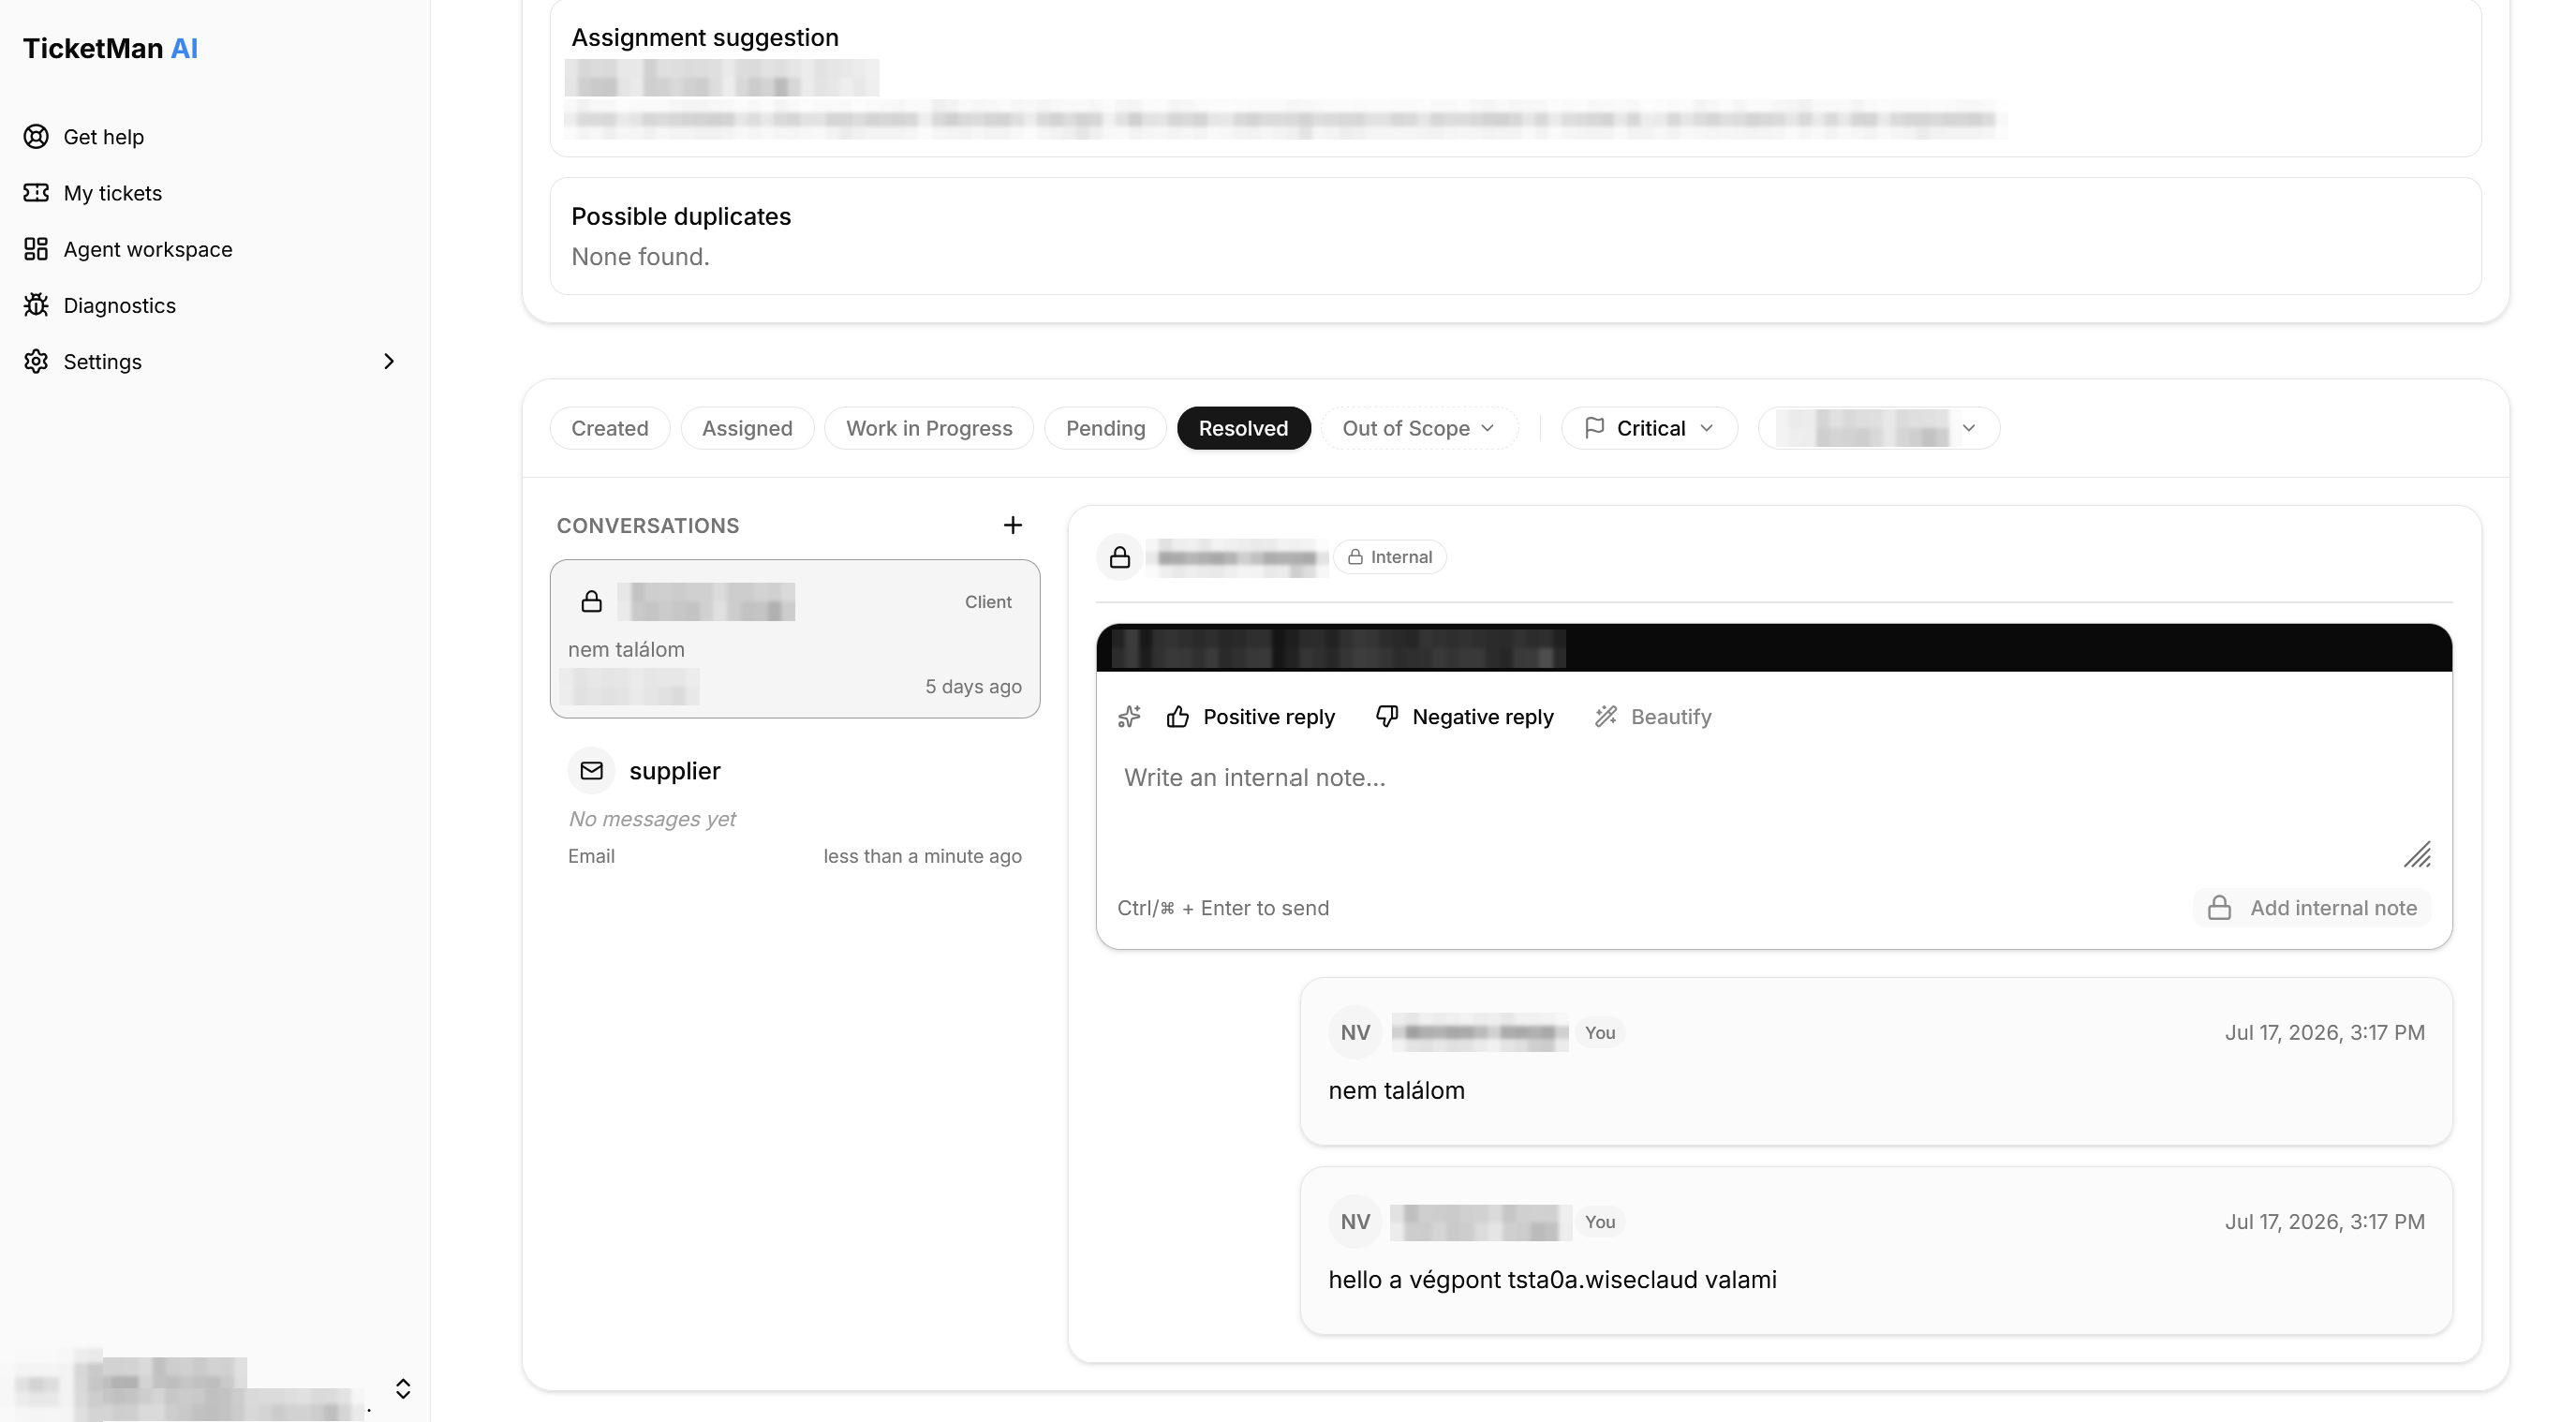
The conversation list
On the left is a list of the ticket's conversations. Every ticket starts with one conversation with the requester, shown under the requester's name. A ticket can have more than one conversation, for example a separate internal thread.
Each entry shows who or what it is with, a preview of the last message, and how long ago that was. Select an entry to open it in the main panel.
Replying to the requester
The default conversation with the requester goes out on the channel the ticket came in on (for example, email). The composer at the top of the conversation shows "Replying via …" and the recipient.
To send a reply:
- Type your message into the box.
- Select "Send" (or press Ctrl/Cmd + Enter).
The message appears at the top of the conversation. If it could not be delivered, it still keeps a red "Failed" mark and stays in the conversation; nothing is lost. A message on its way out is marked "Sending…", and once delivered it is marked "Sent".
The requester is also notified of your reply: it appears under the bell icon on their side, and they receive an email about it.
Adding an internal note
Some conversations are internal: nothing typed into them is ever sent to the requester. The composer shows this clearly with a solid banner reading "Internal note · not visible to …" and its own "Add internal note" button in place of "Send".
Starting a new conversation
Select the plus button above the conversation list to open a new one.
- Choose a channel: "Internal" (never delivered to the requester) or "Email".
- Give it a title.
- Add participants: select "Add teammate" to bring in a colleague, or, for an email conversation, enter an external contact's name and email address and select "Add".
- Select "Create".
Attachments
Files attached to the ticket, whether sent by the requester or added by an agent, are listed on the "Attachments" tab described in "Working a ticket". Select the download icon next to a file to save it.