User manual · Agents
Working a ticket
How to read a ticket's detail page and change its status, priority, and assignment.
This page shows you how to read a ticket's detail page and how to change its status, priority, and assignment.
Open a ticket from the workspace queue, or navigate to it directly, to reach this page.
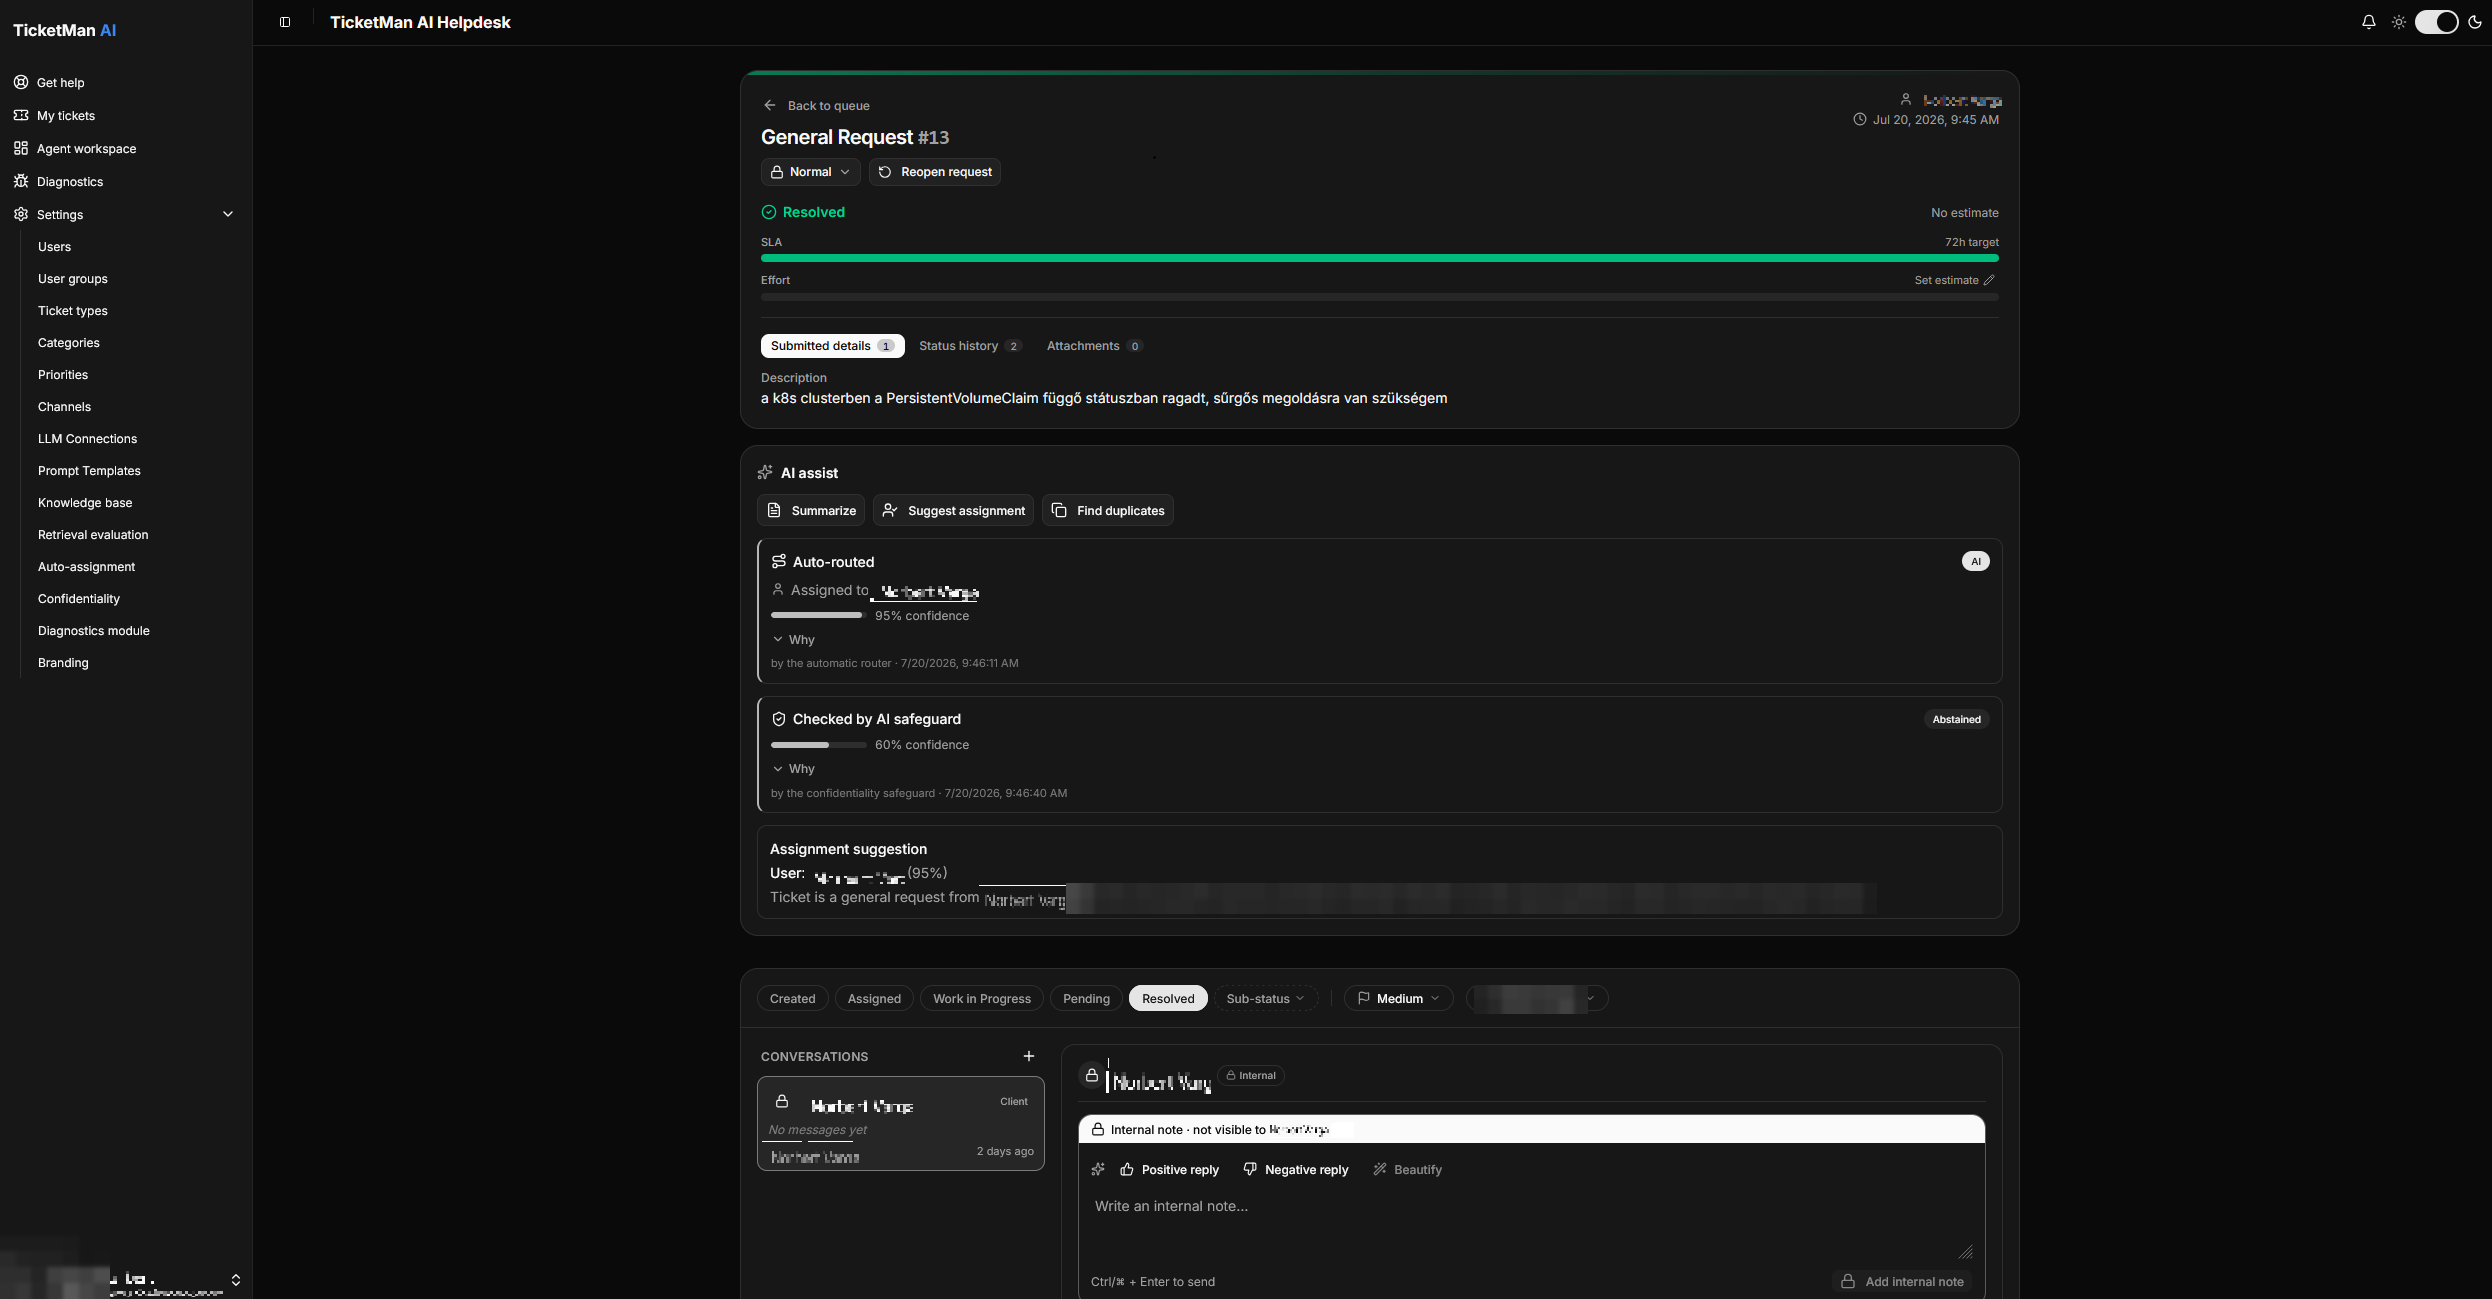
The header
At the top of the page you see:
- A "Back to queue" button.
- The ticket type and its number.
- Its confidentiality level badge (see "Confidential tickets" for what the levels mean and how to change one).
- A "Reopen request" button, if the ticket qualifies to be reopened (see "Reopened tickets and follow-ups").
- A "Follow-up of #…" link, if this ticket was created as a continuation of an older, already-resolved ticket. Select it to jump to the original.
- Who created the ticket, and when, on the right.
The SLA and effort gauge
Two bars sit beneath the header.
The top bar is the SLA clock: how much time is left before the ticket's deadline. The deadline length depends on the ticket's priority. The bar reads "due in …" while time remains, "overdue by …" once the deadline has passed, or "Resolved" once the ticket is done. It pauses and shows "Paused, clock stopped" whenever the ticket is in the "Pending" status, since the clock does not run while work is on hold. If a resolved ticket is later reopened, the clock resumes from where it left off. A ticket type with no deadline configured shows "No SLA".
The bottom bar is effort: hours estimated against hours completed. Select the pencil icon next to it to open a small form with "Estimated effort" and "Completed effort" fields; leave them blank if you do not want to track effort on this ticket. If you have not set an estimate, the bar shows "No estimate".
When the work remaining is more than the time left on the SLA clock, a warning line appears telling you the ticket is running behind.
Submitted details, history, and attachments
A tabbed section below the gauge holds three views, each with a count next to its name:
- Submitted details: the fields the requester filled in when they created the ticket.
- Status history: every status the ticket has moved through, with the date and who changed it.
- Attachments: files attached to the ticket. Select the download icon next to a file to save it.
Changing status
A row of status buttons lets you switch the ticket's status with one selection; the current status is highlighted. Statuses have no fixed order, so you can move between any of them: "Created", "Assigned", "Work in Progress", "Pending", and "Resolved".
If the current status has sub-statuses configured, a dashed dropdown appears next to the status buttons letting you pick one, or "None" to clear it.
Changing priority
Select the priority pill (it shows a flag icon and the current priority) to open a dropdown of every configured priority. Selecting one applies it immediately.
Changing assignment
Select the assignment pill to open a menu:
- Assign to me: takes the ticket.
- Assign to team…: opens a search dialog to pick a team.
- Assign to agent…: opens a search dialog to pick an agent.
- Unassign: appears once the ticket has an assignee, and clears it.
This is the same assignment behavior described in "The ticket workspace", just reached from inside the ticket instead of from a row in the list.
For replying to the requester, adding internal notes, and the conversation history, see "Conversations and replies".